See Airport Transition AI in Action — No Prompt Writing Needed
Generated directly from 1 clear adult portrait—turning gate waiting into a nighttime vacation destination with zero video editing.
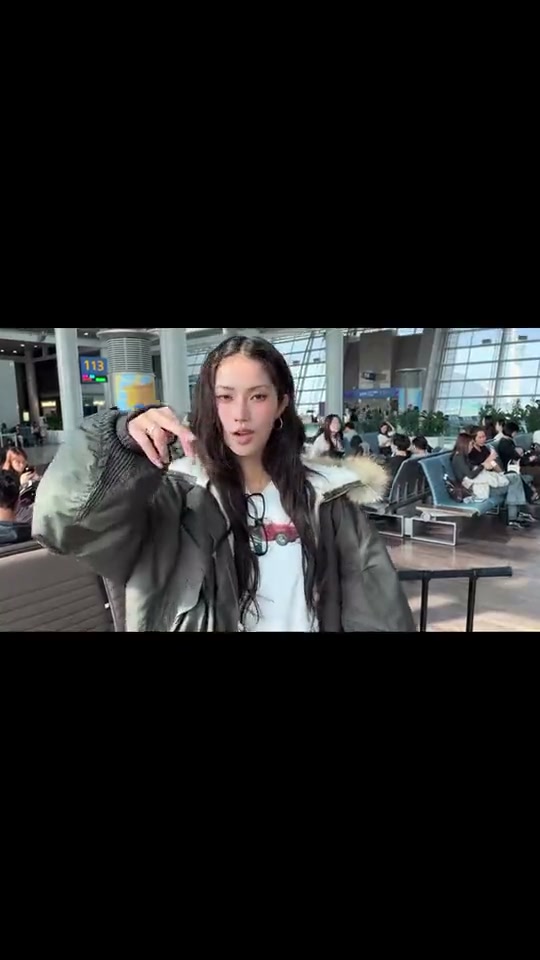
Airport Transition AI casts you pointing toward the camera inside an airport gate lounge, pinching fingers over the camera lens, and match-cutting into a bustling nighttime city travel destination. Using one clear photo on Viral AI Video generates an 8-second MP4 starting at 4 credits (Standard 480p) with zero manual prompts.
- 1Input needed: 1 front-facing adult portrait in clear daylight with open eyes and natural hair styling.
- 2Viral hook: playful terminal finger pinch obscuring the lens right before the rhythm drop.
- 3Matched timeline: 0.0–2.0s gate lounge setup, 2.0–3.0s finger aperture close-up, 3.0–4.0s lens obstruction match cut, 4.0–5.0s destination reveal, 5.0–8.0s night street tracking.
- 4Formats & options: vertical 9:16 portrait across Standard, Fast, Pro, and Ultra models.
- 5Transparent pricing: starts at 4 credits (8s, Standard 480p); failed tasks automatically return reserved credits.
- Clip Length
- 8 Seconds
- Entry Cost
- 4 Credits (480p)
- Aspect Ratio
- 9:16 Vertical
- Photo Input
- 1 Clear Portrait
Why the Finger Lens Cover Cut Works
Short-form travel clips perform exceptionally well when they combine an everyday pre-departure routine with an instantaneous exotic reveal. Instead of a long vlog chronicle, the airport transition format focuses on the excitement of departure:
- Relatable pre-flight atmosphere: Viewers immediately recognize the fluorescent terminal lighting, commercial gate seating, and tarmac backdrop during the opening setup (
0.0–2.0s). - Physical lens-cover masking: Pinching fingers directly against the phone lens (
2.0–4.0s) creates a natural physical obstruction that serves as an organic match-cut mask. - High-contrast visual release: When the hand pulls back (
4.0–8.0s), the immediate shift to nighttime city streetlights and urban vibrancy delivers a strong dopamine hit that keeps audience watch time high.
8-Second Shot-by-Shot Beat Breakdown
| Timestamp | Phase | What Happens on Screen | Why Your Photo Matters Here |
|---|---|---|---|
| 0.0s – 2.0s | Terminal Lounge Setup | You smile and gesture toward the camera while seated in an airport gate waiting lounge with illuminated runways and terminal seating in the background. | Even frontal lighting on your face keeps facial contours crisp before the camera pushes close. |
| 2.0s – 3.0s | Finger Aperture Close-Up | You raise your right hand toward the lens, forming a circular finger pinch directly in front of the camera. | Avoid hands-in-pockets or cropped arm portraits so shoulder and arm motion flows naturally. |
| 3.0s – 4.0s | Lens Cover Transition Cut | Your fingertips press flush against the glass lens, briefly obscuring the frame right at the beat drop. | The built-in motion choreography handles hand speed and transition masking automatically. |
| 4.0s – 5.0s | Destination Arrival Reveal | The hand pulls away to reveal you standing on a vibrant nighttime urban street flanked by streetlights and railing. | A clear outfit in your photo translates seamlessly across both terminal casual and vacation evening wear. |
| 5.0s – 8.0s | Night City Street Tracking | The camera pulls back into a smooth tracking shot as you smile confidently against flowing city traffic and ambient night glow. | A single subject photo ensures zero secondary bystanders bleed into the destination tracking shot. |
How to Pick the Best Portrait Photo (Zero-Prompt Workflow)
Because the studio handles the terminal choreography and destination match-cut on the server, you never write a prompt. Picking a high-clarity source photo is the single most important choice you control:
High-Accuracy Travel Portraits vs. Common Upload Mistakes
Because this effect runs on a locked motion preset with zero prompt typing, photo selection accounts for most of the final quality.
Upload Photos Like This
- Front-facing or slight three-quarter adult portrait where both eyes, nose, and hairstyle are clearly visible.
- Even natural daylight or soft indoor lighting showing true skin tone and facial features.
- Uncluttered background with only one person in the entire frame.
- Clear chest-up or head-and-shoulders framing without hands blocking the face.
- Natural facial expression without sunglasses, tinted lenses, or heavy beauty filters.
Avoid These Mistakes
- Group photos or party pictures with multiple people crowded into the frame.
- Dark backlit silhouettes or dimly lit selfies where facial features blend into shadows.
- Low-resolution, pixelated, or motion-blurred photos where eye details are lost.
- Portraits wearing heavy sunglasses, ski goggles, or wide-brimmed hats obscuring the eyes or hairline.
- Photos of celebrities, public figures, or third parties without explicit consent.
Ready to Make Your Airport Transition Video?
Have Your Portrait Ready? Launch Straight Into the Studio
Pick 1 clear adult portrait here to carry it into the Airport Transition AI studio pre-loaded—review your exact credit estimate (from 4 credits at 480p) and generate your 8-second travel cut in seconds.
 8s MP4
Preset Studio vs. CapCut Templates: Which Should You Use?
Creators searching for "airport transition CapCut template" usually want a fast shortcut to join the travel countdown trend without spending hours masking keyframes. Here is how the AI video preset compares to static template cutouts:
Airport Transition AI Preset vs. CapCut Templates
| What Matters | Viral AI Video Preset | Typical CapCut Template |
|---|---|---|
| How you appear in the video | Synthesizes a fluid 8-second motion clip guided by your portrait photo and the built-in travel reference across both terminal and destination. | Places 2D cutouts, stickers, or static photo cutouts onto pre-recorded stock vacation clips. |
| Terminal & destination synthesis | Generates the airport gate lounge, finger lens obstruction, and nighttime city street tracking automatically. | Requires pre-recorded video clips from your trip or relies on fixed third-party template footage. |
| Manual editing required | Zero manual prompts or keyframes—upload 1 photo, review credits, generate and preview. | Quick for pre-cut slots; custom sound syncing and masking often require manual trimming. |
| Resolution & aspect ratio options | Generates 9:16 vertical MP4s optimized for TikTok, Reels, and Shorts across 480p, 720p, and 1080p (Pro+). | Depends on the author template settings and export quality tier. |
| Credit model vs. subscription | Starts at 4 credits per 8s Standard 480p clip; purchased credit packs never expire (subscription rules differ). | Free basic templates, while Pro filters, effects, and exports require recurring subscriptions. |
Audio, Previewing & Posting Tips
Before downloading and publishing your completed clip to social media, keep these three creator practices in mind:
- Preview the full 8-second motion before sharing: Match cuts and finger obstructions happen within tenths of a second. Always watch the complete preview in the studio to confirm facial likeness across both scenes before posting.
- Pair with trending travel audio on your destination platform: The studio requests natural ambient terminal sounds without copyrighted commercial songs. Attach an approved audio track directly from TikTok, Instagram Reels, or YouTube Shorts during upload to maximize algorithmic reach.
- Keep synthetic media transparent: Turning on the platform’s AI-generated content flag maintains compliance with short-form community standards. Looking to explore more viral formats? Check out our Fitting Room Outfit Change AI for rapid wardrobe reveals, or give your furry companion the spotlight with Cat Riding Dirt Bike AI and our pet stunt photo guide.